Roasting your own coffee beans at home can be a rewarding experience. It lets you control the flavor, aroma, and freshness of your daily cup. Many people think roasting coffee is difficult, but with the right guidance, anyone can do it. You do not need expensive equipment or years of practice. What you need is curiosity, a little patience, and a willingness to experiment. This guide will walk you through everything you need to know to roast coffee beans successfully, from choosing green beans to enjoying your perfect brew.
Coffee roasting is more than just heating beans. It is a mix of science, art, and personal taste. Every step, from selecting beans to cooling them, affects the final flavor. If you want to enjoy coffee that matches your own preferences, roasting is the way to do it.
You will also save money and enjoy fresher coffee than anything you can buy in a store.
Let’s discover how to roast coffee beans at home, step by step.
Why Roast Coffee Beans Yourself?
Home roasting is gaining popularity for good reasons. The taste and aroma of freshly roasted coffee are hard to match. Store-bought beans lose their freshness fast, sometimes just days after roasting. When you roast at home, you get to enjoy coffee at its peak.
Another benefit is customization. You decide whether you want a light, medium, or dark roast. You can even blend different beans to create your own signature flavor.
Home roasting can also be cheaper. Green coffee beans cost less than roasted beans. For coffee lovers who drink several cups a day, these savings add up quickly.
Many people also enjoy the process itself. Watching the beans change color, hearing the first crack, and smelling the rich aromas can be very satisfying. It is a hands-on hobby that gives you a deeper connection to your coffee.
Understanding Green Coffee Beans
Before you roast, you need green coffee beans. These are raw, unroasted seeds from the coffee plant. Their quality matters a lot because even the best roasting technique cannot fix bad beans.
What To Look For
When buying green coffee beans, pay attention to:
- Origin: Beans from different countries have unique flavors. For example, Ethiopian beans are often fruity, while Brazilian beans are nutty.
- Variety: Arabica beans are smoother and more complex than robusta, which is stronger and more bitter.
- Processing method: Washed beans are usually cleaner in flavor, while natural or dry-processed beans are fruitier.
- Freshness: Green beans last longer than roasted beans, but fresher beans roast better. Buy from a reputable supplier.
Storing Green Beans
Green beans should be stored in a cool, dry place. Use an airtight container and keep them away from sunlight. Proper storage helps preserve their quality for up to a year.
Coffee Roasting Methods
There are several ways to roast coffee at home. Each method has its pros and cons. Your choice will depend on your budget, how much coffee you want to roast, and your willingness to experiment.
1. Pan Roasting
This is the most basic way to roast coffee. You only need a heavy skillet (preferably cast iron) and a stovetop.
- Pros: Low cost, easy to try, no special equipment.
- Cons: Hard to control temperature, uneven roasting is common, produces smoke.
2. Oven Roasting
Roasting in the oven is simple and allows you to roast larger amounts.
- Pros: You can roast more beans at once, uses equipment most people already have.
- Cons: Less control over roast level, may roast unevenly, lots of smoke.
3. Popcorn Popper
An air popcorn popper can be used to roast small batches.
- Pros: Fast, affordable, roasts evenly if beans move well.
- Cons: Only works with certain popper models, limited capacity, can overheat.
4. Home Coffee Roaster
Specialized coffee roasting machines are designed for home use.
- Pros: Best control over roast, consistent results, less smoke.
- Cons: Higher cost, takes up space.
Comparing Roasting Methods
Here is a quick comparison of popular home roasting methods:
| Method | Cost | Batch Size | Control | Smoke |
|---|---|---|---|---|
| Pan Roasting | Low | Small | Poor | High |
| Oven Roasting | Low | Medium | Fair | High |
| Popcorn Popper | Low | Small | Good | Medium |
| Coffee Roaster | High | Medium | Excellent | Low |
Step-by-step Guide: How To Roast Coffee Beans At Home
Now, let’s go through the roasting process step by step. For this guide, we will use the pan roasting method, as it is the most accessible. However, most steps apply to other methods too.
1. Gather Your Equipment
You will need:
- Green coffee beans
- Heavy skillet (cast iron works best)
- Wooden spoon
- Stovetop
- Colander (for cooling)
- Bowl (optional, for chaff removal)
- Oven mitts (for safety)
- Timer or clock
2. Prepare The Area
Roasting coffee makes smoke and a strong smell. Open windows and turn on the fan if you can. Make sure there is enough space to move safely. Place all tools within easy reach.
3. Preheat The Pan
Put the skillet on medium heat for 1-2 minutes. You want the pan hot, but not smoking. A hot pan helps beans roast evenly.
4. Add The Beans
Pour a single layer of green coffee beans into the pan. Do not overcrowd. Beans should move easily when stirred.
5. Stir Constantly
Use the wooden spoon to stir the beans non-stop. Even movement prevents burning and helps all the beans roast at the same rate.
6. Watch For Color Changes
At first, beans will turn yellow and smell grassy. This stage is called drying and takes about 4-6 minutes. Then, the beans turn light brown and start to expand.
7. Listen For The First Crack
After about 6-8 minutes, you will hear popping sounds like popcorn. This is called the first crack. It means the beans are reaching a light roast.
- Light roast: Stop roasting soon after the first crack if you like a bright, acidic coffee.
- Medium roast: Keep roasting for 1-2 minutes more. Beans will be medium brown.
- Dark roast: Continue until you hear the second crack (quieter, more frequent pops). Beans will be dark, oily, and less acidic.
8. Remove From Heat
Once your beans reach the desired roast, quickly pour them into a colander. This stops further cooking. Shake or stir to cool them down fast.
9. Remove The Chaff
Roasted beans shed a thin, papery skin called chaff. Blow gently or shake beans in a bowl outside to remove most of it.
10. Let The Beans Rest
Freshly roasted beans release gases, especially carbon dioxide. Wait at least 12-24 hours before grinding and brewing. This rest time lets the flavors settle.
Step-by-step Roasting Timeline Example
For a medium roast, here’s what you might expect:
| Time (Minutes) | Stage | What to Watch For |
|---|---|---|
| 0-2 | Heating Pan | Pan hot, but not smoking |
| 2-6 | Drying Phase | Beans turn yellow, grassy smell |
| 6-8 | First Crack | Loud pops, light brown beans |
| 8-10 | Development | Beans become medium brown |
| 10-12 | Second Crack (optional) | Quieter pops, dark beans |
| 12+ | Cooling | Remove from heat, cool quickly |
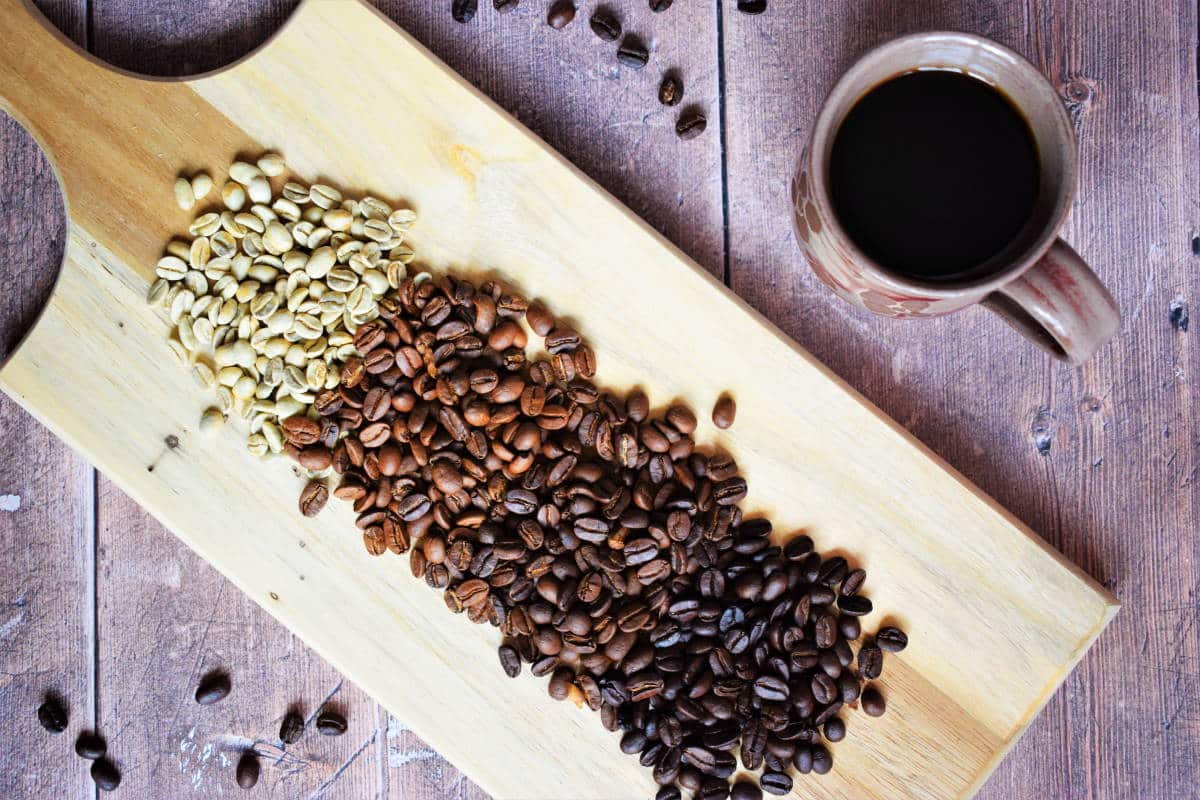
Different Roast Levels: How They Affect Flavor
The roast level changes how your coffee will taste. Each level has unique qualities.
Light Roast
- Color: Light brown
- Flavor: Bright, acidic, floral, fruity notes
- Body: Light
- Caffeine: Slightly higher
- Best for: Single-origin beans where you want to taste the unique characteristics
Medium Roast
- Color: Medium brown
- Flavor: Balanced acidity and sweetness, nutty or chocolatey notes
- Body: Medium
- Caffeine: Slightly less than light roast
- Best for: Most brewing methods, all-purpose coffee
Dark Roast
- Color: Dark brown to almost black, often oily
- Flavor: Bittersweet, smoky, less acidity, more body
- Body: Heavy
- Caffeine: Slightly lower
- Best for: Espresso, fans of bold flavors
Tips For Better Home Roasting
Getting great results takes practice. Here are some tips to improve your roasting:
- Start with small batches. This helps you learn without wasting beans.
- Use a thermometer if possible, to monitor the pan’s temperature.
- Keep notes. Write down bean type, roast time, and results. This helps you repeat good roasts.
- Try different beans. Experiment with origins and blends.
- Adjust for your equipment. Every stove, oven, and popper is different.
- Be patient. Flavors improve after resting 1-2 days.
Many beginners do not realize that cooling speed makes a big difference. Beans that cool slowly can taste flat or bitter. Also, the ambient temperature in your kitchen will affect roasting times more than you think—hot days speed things up, cold rooms slow them down.
Common Mistakes To Avoid
If you are new to roasting, you might make some mistakes. Here is how to avoid the most common ones:
- Overcrowding the pan: Beans need space to move, or they will roast unevenly.
- Not stirring enough: In pan and oven methods, lack of movement causes burning.
- Ignoring the smell: Burnt or acrid smells mean beans are burning.
- Not cooling beans fast enough: Slow cooling continues the roasting and can ruin flavor.
- Using poor-quality beans: Even perfect roasting cannot fix bad beans.
- Skipping the rest period: Freshly roasted beans need to de-gas for best flavor.
Storing Roasted Coffee
Once your beans are roasted and rested, you need to store them properly.
- Use an airtight container to keep out moisture and air.
- Store in a cool, dark place (not the refrigerator).
- For best flavor, use beans within 2-3 weeks.
- Grind only what you need before brewing.
If you want to extend freshness, consider a container with a one-way valve. This lets gas escape but keeps air out. Vacuum-sealed bags also work well.
Grinding And Brewing Your Freshly Roasted Coffee
Grinding just before brewing gives you the freshest flavor. The grind size depends on your brewing method:
| Brewing Method | Grind Size | Notes |
|---|---|---|
| French Press | Coarse | Chunky, like sea salt |
| Drip Coffee Maker | Medium | Like sand |
| Espresso | Fine | Like table salt or sugar |
| Pour Over | Medium-Fine | Slightly finer than drip |
Use a burr grinder for the most consistent results. Blade grinders are cheaper, but they do not produce even particles, which can affect taste.
Experimenting With Blends And Flavors
One advantage of home roasting is the chance to create your own blends. Try mixing beans from different origins or roast levels. For example, combine a fruity Ethiopian light roast with a chocolatey Colombian medium roast for a more complex cup.
You can also try adding spices like cinnamon or cardamom to beans just after roasting for a unique flavor twist. However, always taste your beans plain first to understand their true character.
Some experienced home roasters even experiment with aging green beans or roasting in multiple stages to unlock different flavors. If you enjoy experimenting, keep notes on what you try and how it tastes.

Health And Safety Tips
Roasting coffee creates smoke and heat. Here are some ways to stay safe:
- Always roast in a well-ventilated area.
- Keep a fire extinguisher nearby, especially if roasting indoors.
- Use oven mitts when handling hot pans or roasters.
- Do not leave roasting beans unattended.
- Let equipment cool before cleaning or storing.
Remember, some people are sensitive to smoke, so be considerate of others in your home.
Environmental Impact Of Home Roasting
Roasting at home can be more eco-friendly than buying pre-roasted coffee. You avoid extra packaging, and you can compost the chaff. However, electricity or gas use and smoke are factors to consider. Always follow local rules about air quality and fire safety.
If you want to make your roasting even greener, look for ethically sourced or organic green beans. These often have a smaller environmental footprint and support fair working conditions.
When To Upgrade Your Roasting Setup
Many home roasters start with simple methods but upgrade as their skills grow. Signs you might want to invest in a home coffee roaster:
- You roast more than 1-2 times per week.
- You want better control over temperature and roast profile.
- You need to roast larger batches.
- You want less smoke in your home.
A dedicated coffee roaster can cost from $100 to $800 or more. Popular brands include Behmor, FreshRoast, and Gene Cafe. If you want to learn more about advanced roasting equipment and techniques, check out this detailed resource: Wikipedia: Home Roasting Coffee.
Frequently Asked Questions
What Is The Easiest Way To Roast Coffee Beans At Home?
The easiest way is with a popcorn popper or a heavy skillet on your stovetop. Both methods need only basic tools and can produce good results with practice. Popcorn poppers roast more evenly but have limited capacity.
How Much Coffee Should I Roast At One Time?
Start with small batches—about 100-150 grams (1/4 to 1/3 pound) of green beans. This helps you learn the process and reduces waste if mistakes happen. Once you are confident, you can roast larger amounts.
Why Do My Roasted Coffee Beans Taste Bitter?
Bitterness usually comes from over-roasting or burning the beans. Try stopping the roast earlier, or lower the heat. Uneven roasting and poor-quality beans can also cause bitterness.
Can I Roast Coffee Beans Without Any Special Equipment?
Yes. A pan on the stove or your oven is enough to start. Stir constantly and watch the beans closely. Just be aware that these methods are less consistent than using a dedicated roaster.
How Long Do Roasted Coffee Beans Stay Fresh?
Roasted beans are best within 2-3 weeks of roasting, if stored in an airtight container away from light and heat. After that, flavors fade, and the coffee may taste flat. Grind just before brewing for the best taste.
Home roasting is a journey that rewards curiosity and patience. With each batch, you will learn more about your own taste preferences and the magic inside every coffee bean. Soon, you will enjoy cups that are fresher, tastier, and perfectly tailored to your liking.
Whether you stick to simple equipment or move up to advanced tools, roasting coffee beans at home is a skill that will change how you experience coffee forever.